I was asked by some viewers of my blog, how I did the cloud background for some of my last few cards. So I've compiled the a step-by-step guide below. Hope this will help you with your designs or spur your imaginative thinking on how to improve/expand on it's usage.
Step 1: Prepare the required items
a) Pebbles Chalks (can be replace with distress inks/watercolours)
b) Carl puncher
c) Fixative spray-
Step 2: Punch a cloud use scrap paper. If you dont have the puncher you can draw by yourself
Step 3:
Take the biggest "cotton ball" and choose the lighter colour.
The reason is once you spray fixative, the colour will become slightly darker. Dab the cotton ball on the chalks, get a little bit chalks for the first time. Once you get use to with it, dab more chalks.
Step 4:
Place the punched cloud on the paper. Do chalking in circular motions
Step 5:
Left side: The result of the step 4.
Right side: Overlap chalking till the whole page full
Result of several masking
Step 6:
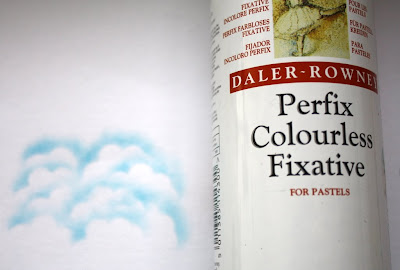
Take fixative spray and spray to the chalked paper
The result after spray--slightly darker than before.
Hope this help
Regards,
Scrapco...


Hi
ReplyDeleteThank you very much for your tips & technique on this. I really really impress with this as I never thought of by using just a punches & chalked ink can make such a nice pattern of sky. Its very useful to me. Will try it out. By the way may I know where can I get the spray?
Once again thank you very much & hope to see your new card soon (hopefully can learn more tips & technique from you ha ha !!).
Best Regards
Melon
Hi Melon ^_^
ReplyDeleteGlad to hear that you understand the tips-(my english is not good). Well,i dont really good at technique actually. but if you have something to ask just drop me a comments i will try to create tutorial for that ^_^
for the fixative spray, I bought in Art Friend. Not sure in myour country. Are you in singapore also?
FYI, i created another card with cloud but this time i use distress ink.
Scrapco....
Regards,
Thanks for the tutorial...
ReplyDeleteI may get one Fixative soon...♥
Really thank you for your tip!
ReplyDelete